
Bookbinding with Kids: Creating Notebooks with Sticks
Moving forward with Monoprints
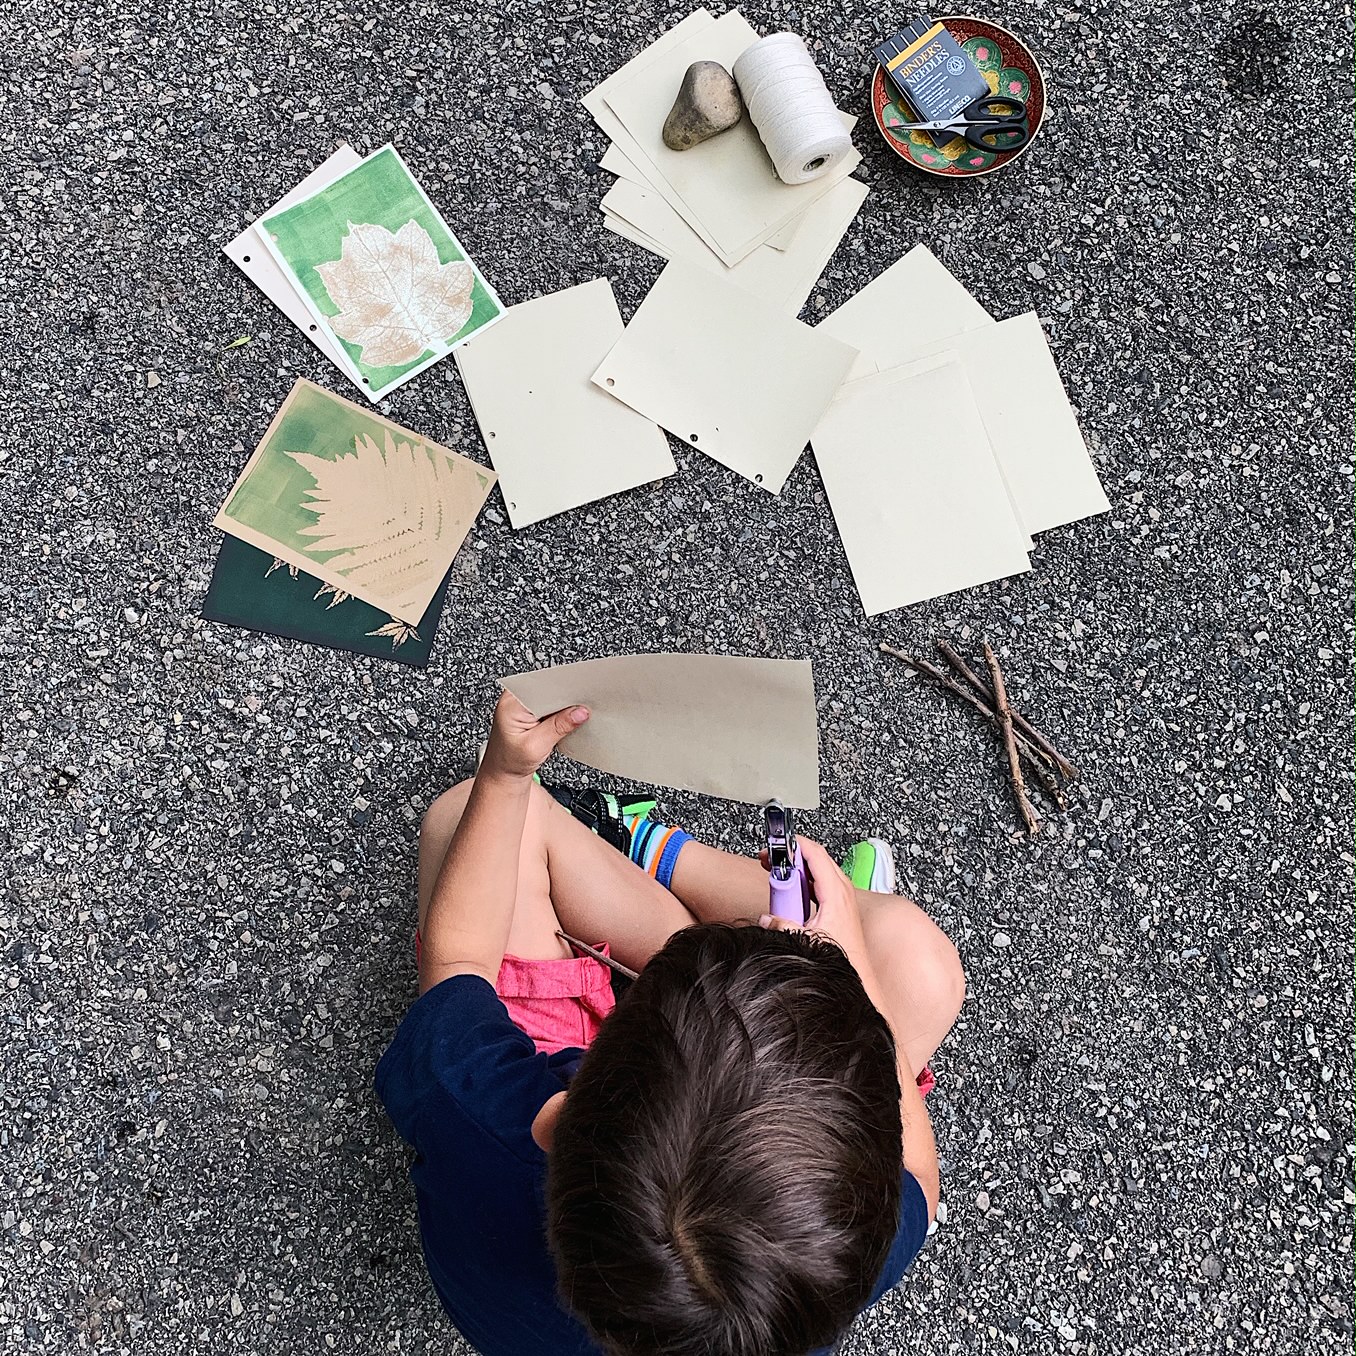
After last week’s monoprinting with clippings from our backyard, SJ and I found ourselves with a solid pile of prints. We kept some and sent some as fun surprises to friends, but we still have some left over. We decided to use them to make beautiful keepsake notebooks!
Bookbinding with Sticks
Because the monoprints use elements from nature, mostly leaves, we decided to stick with that theme. When I was a little girl, I remember making “nature observation” booklets using sticks and either pampas grass or string. I thought it would be nice to replicate that, using our pretty prints.
We made our first one together yesterday, which he has now squirreled away in his room (oh, kids), but I recreated the steps again today with better lighting. Check out photos with SJ at the bottom!

Finding Your Inspiration
In this case, we were already drawing inspiration from last week’s prints, and so we set off to collect sticks from our yard. We have a lot of really great big trees, which drop sticks now and then, especially after all of our recent storms. Thinner ones work best, so “twig” might be a more accurate description!
This collection might have been SJ’s favorite part. He ran around the yard with a whole collection in his arms, asking, “This one?” over and over. He then divided them into which ones he thought were pretty, which was kind of fascinating. He loved the ones with texture and color variations.
Ultimately, you just need some that are around the same size as the paper you plan to use.
Let’s Make a Book!
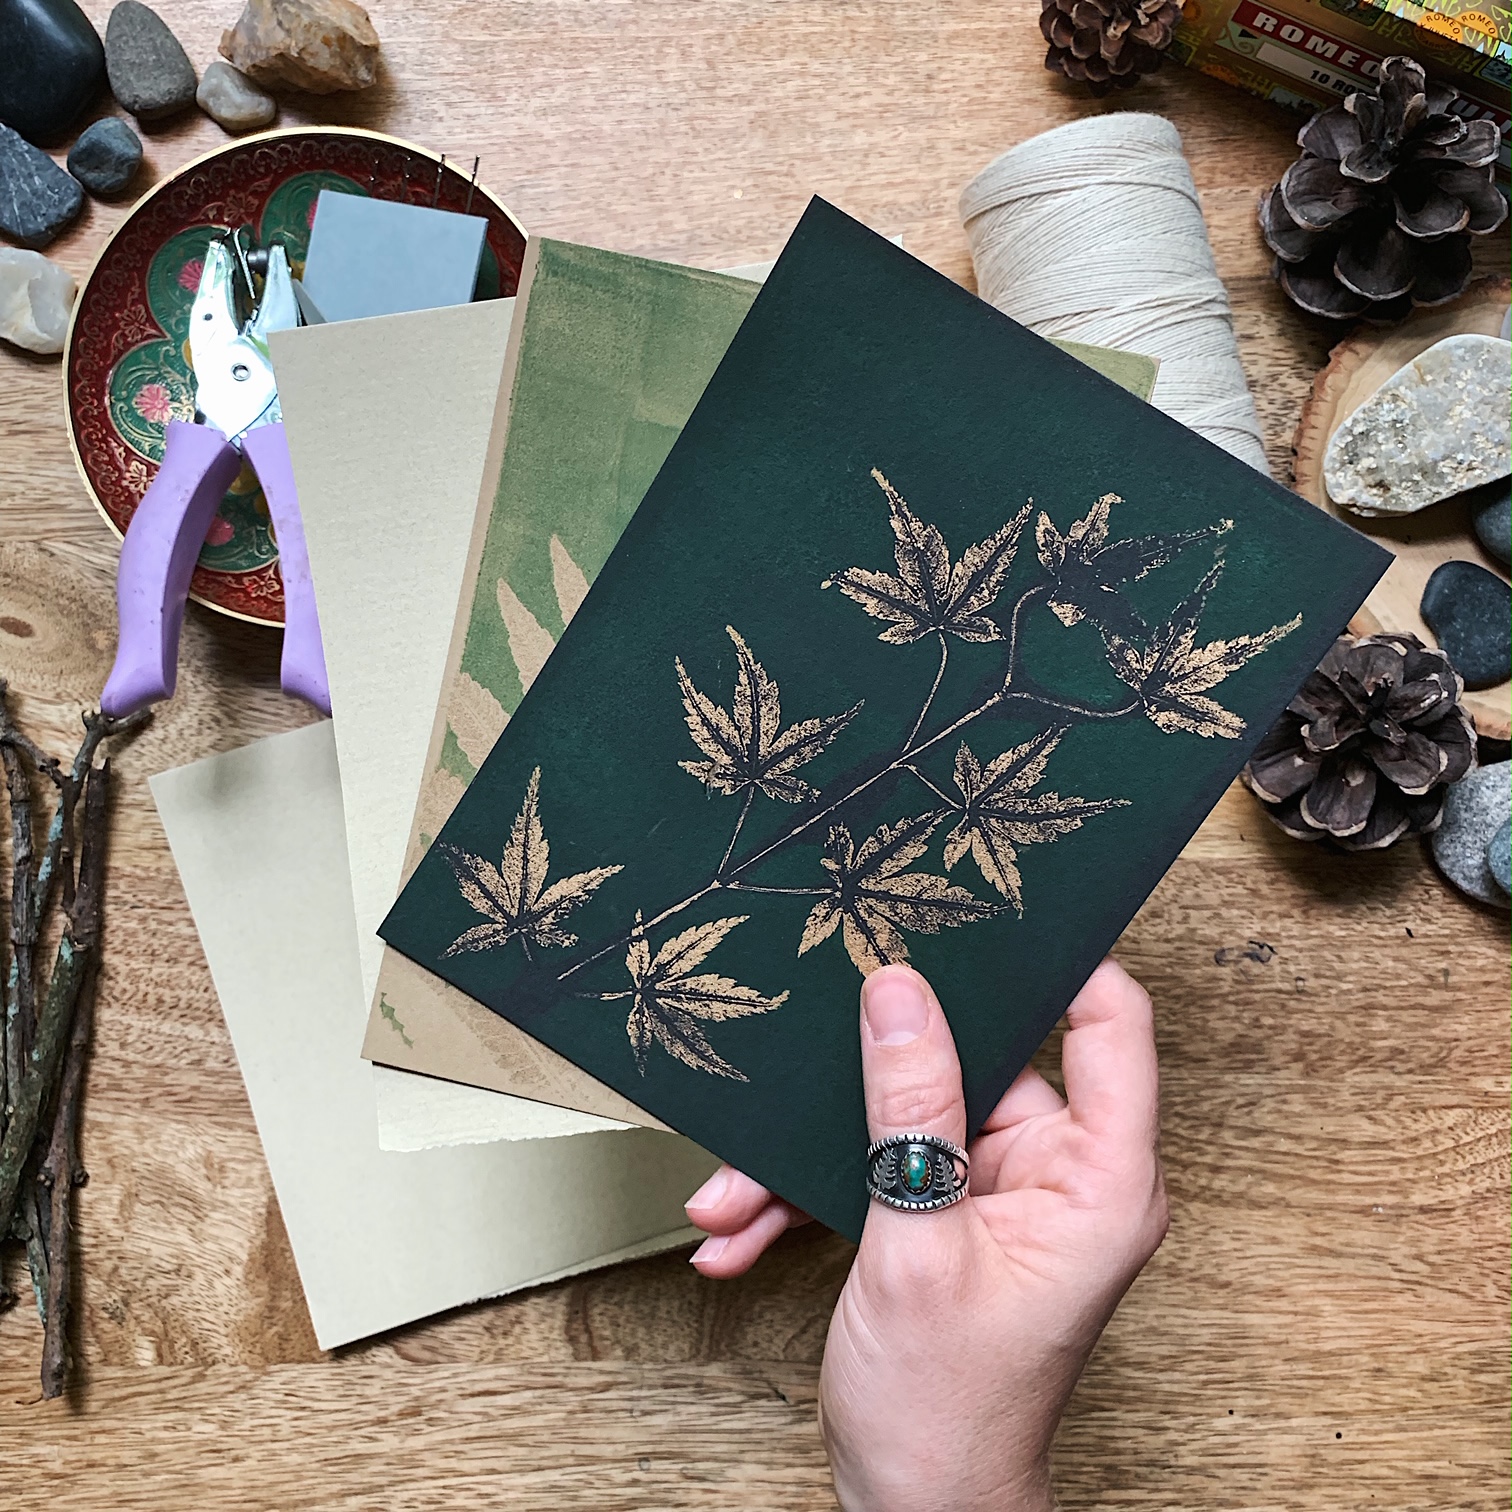
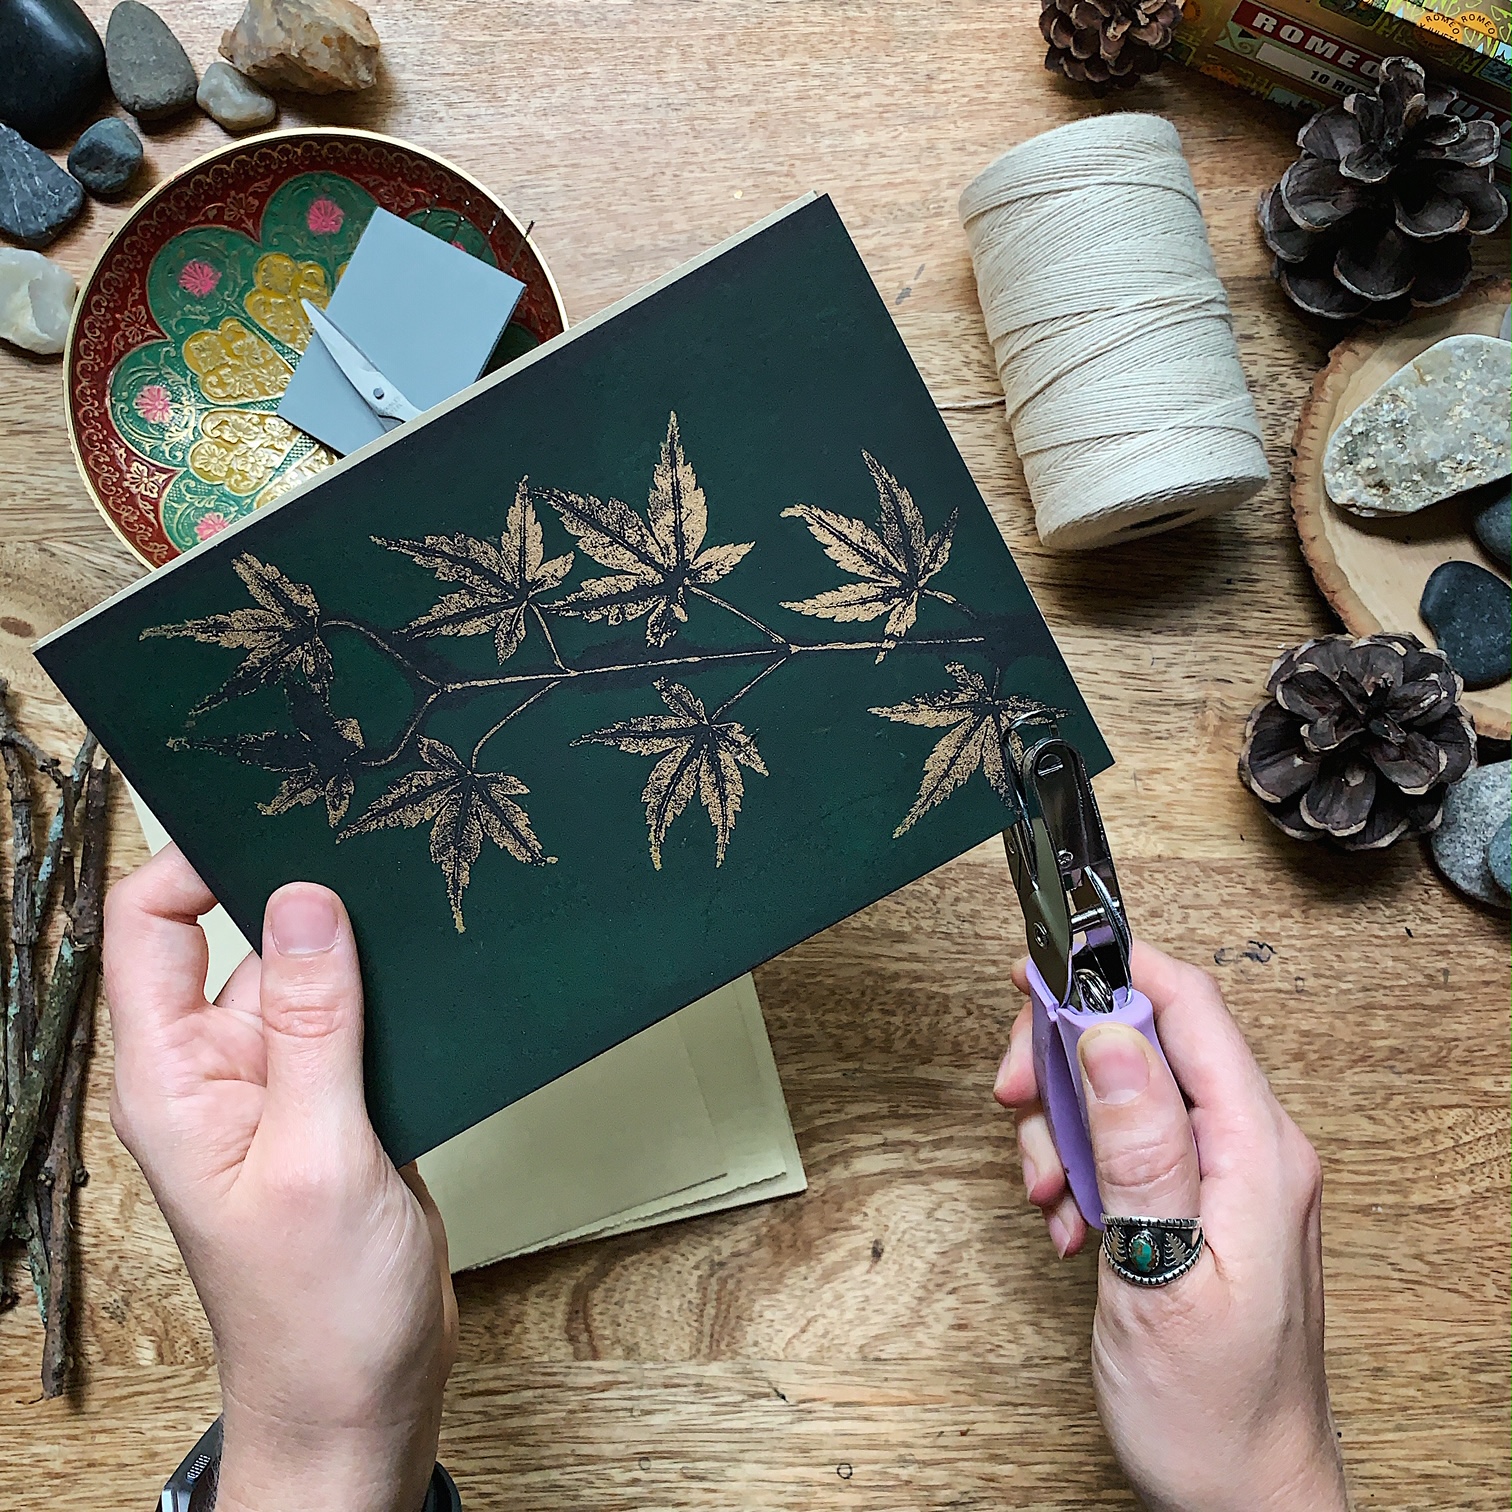
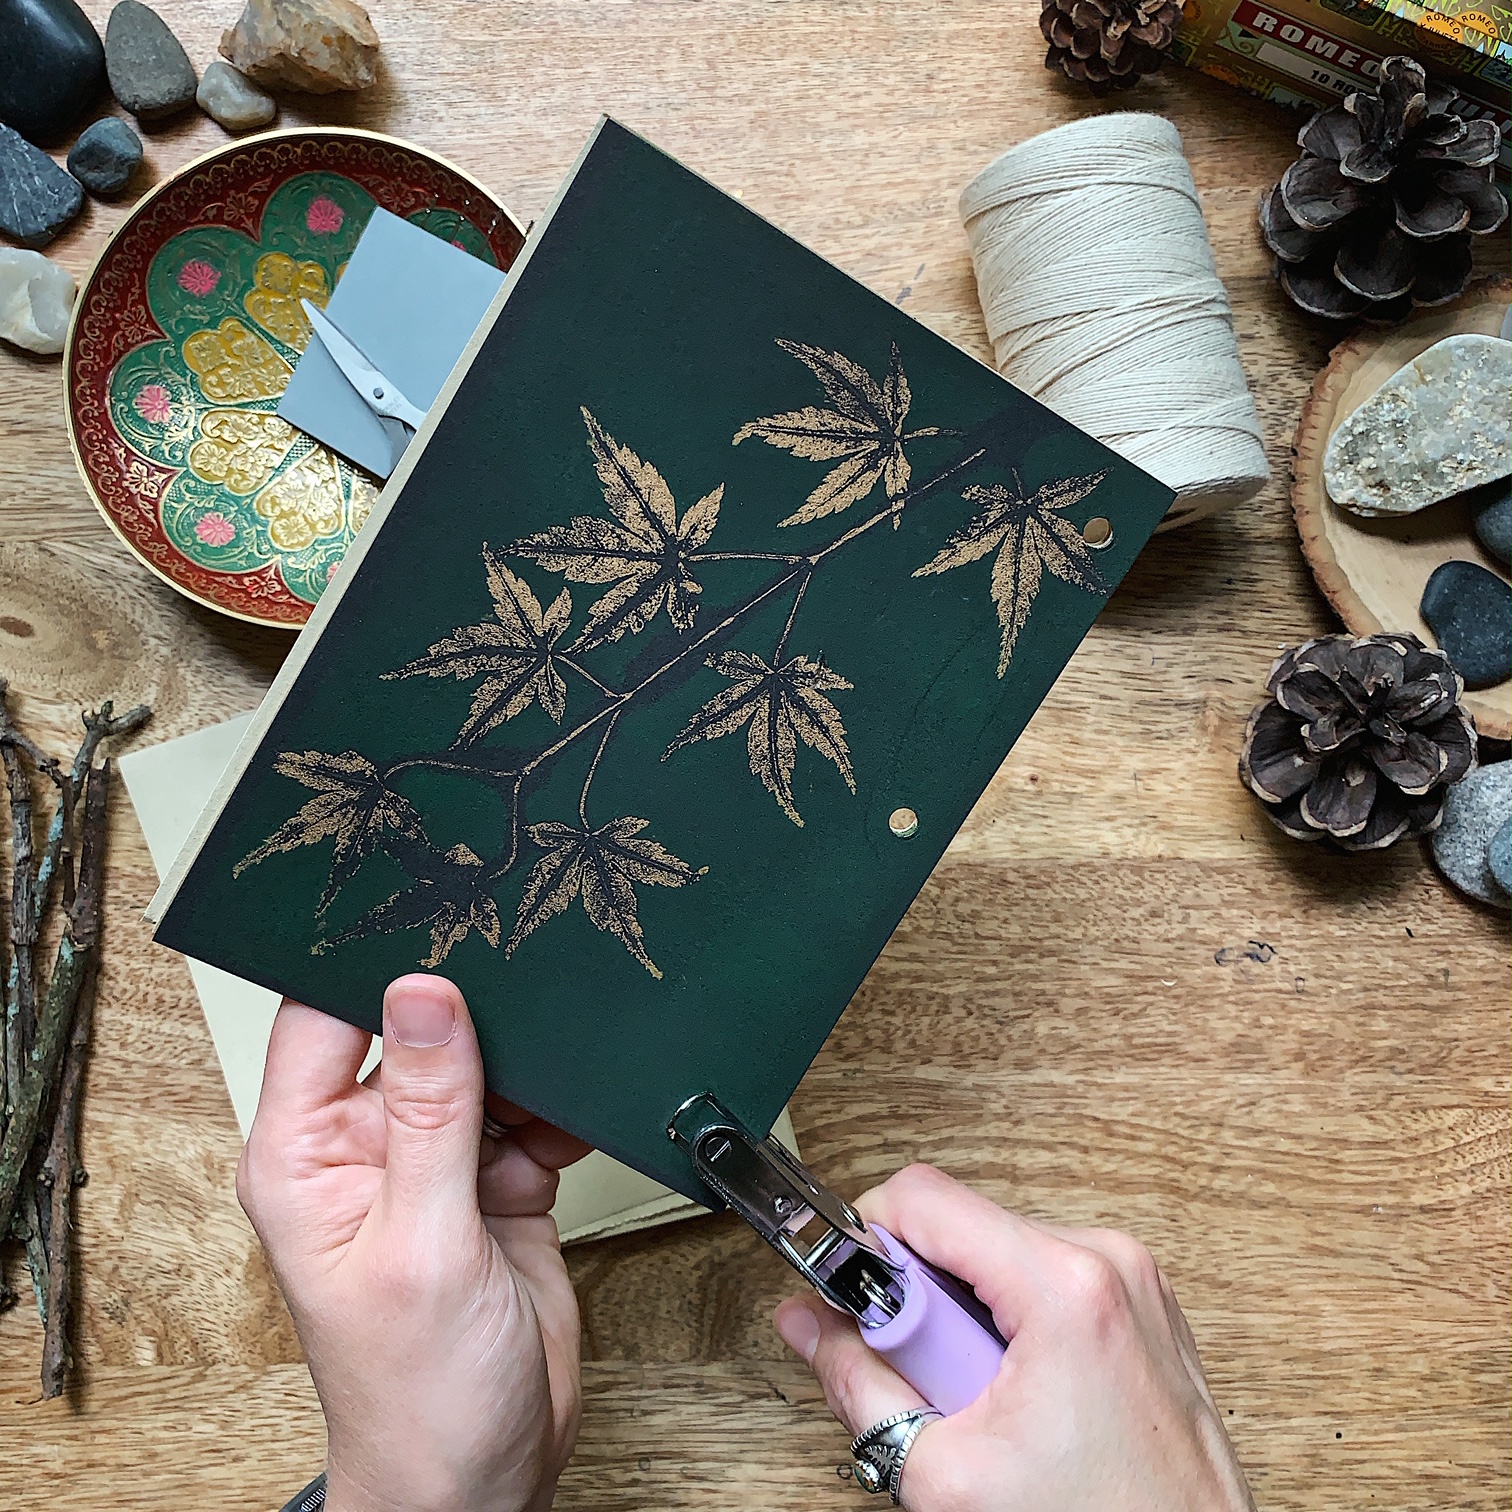
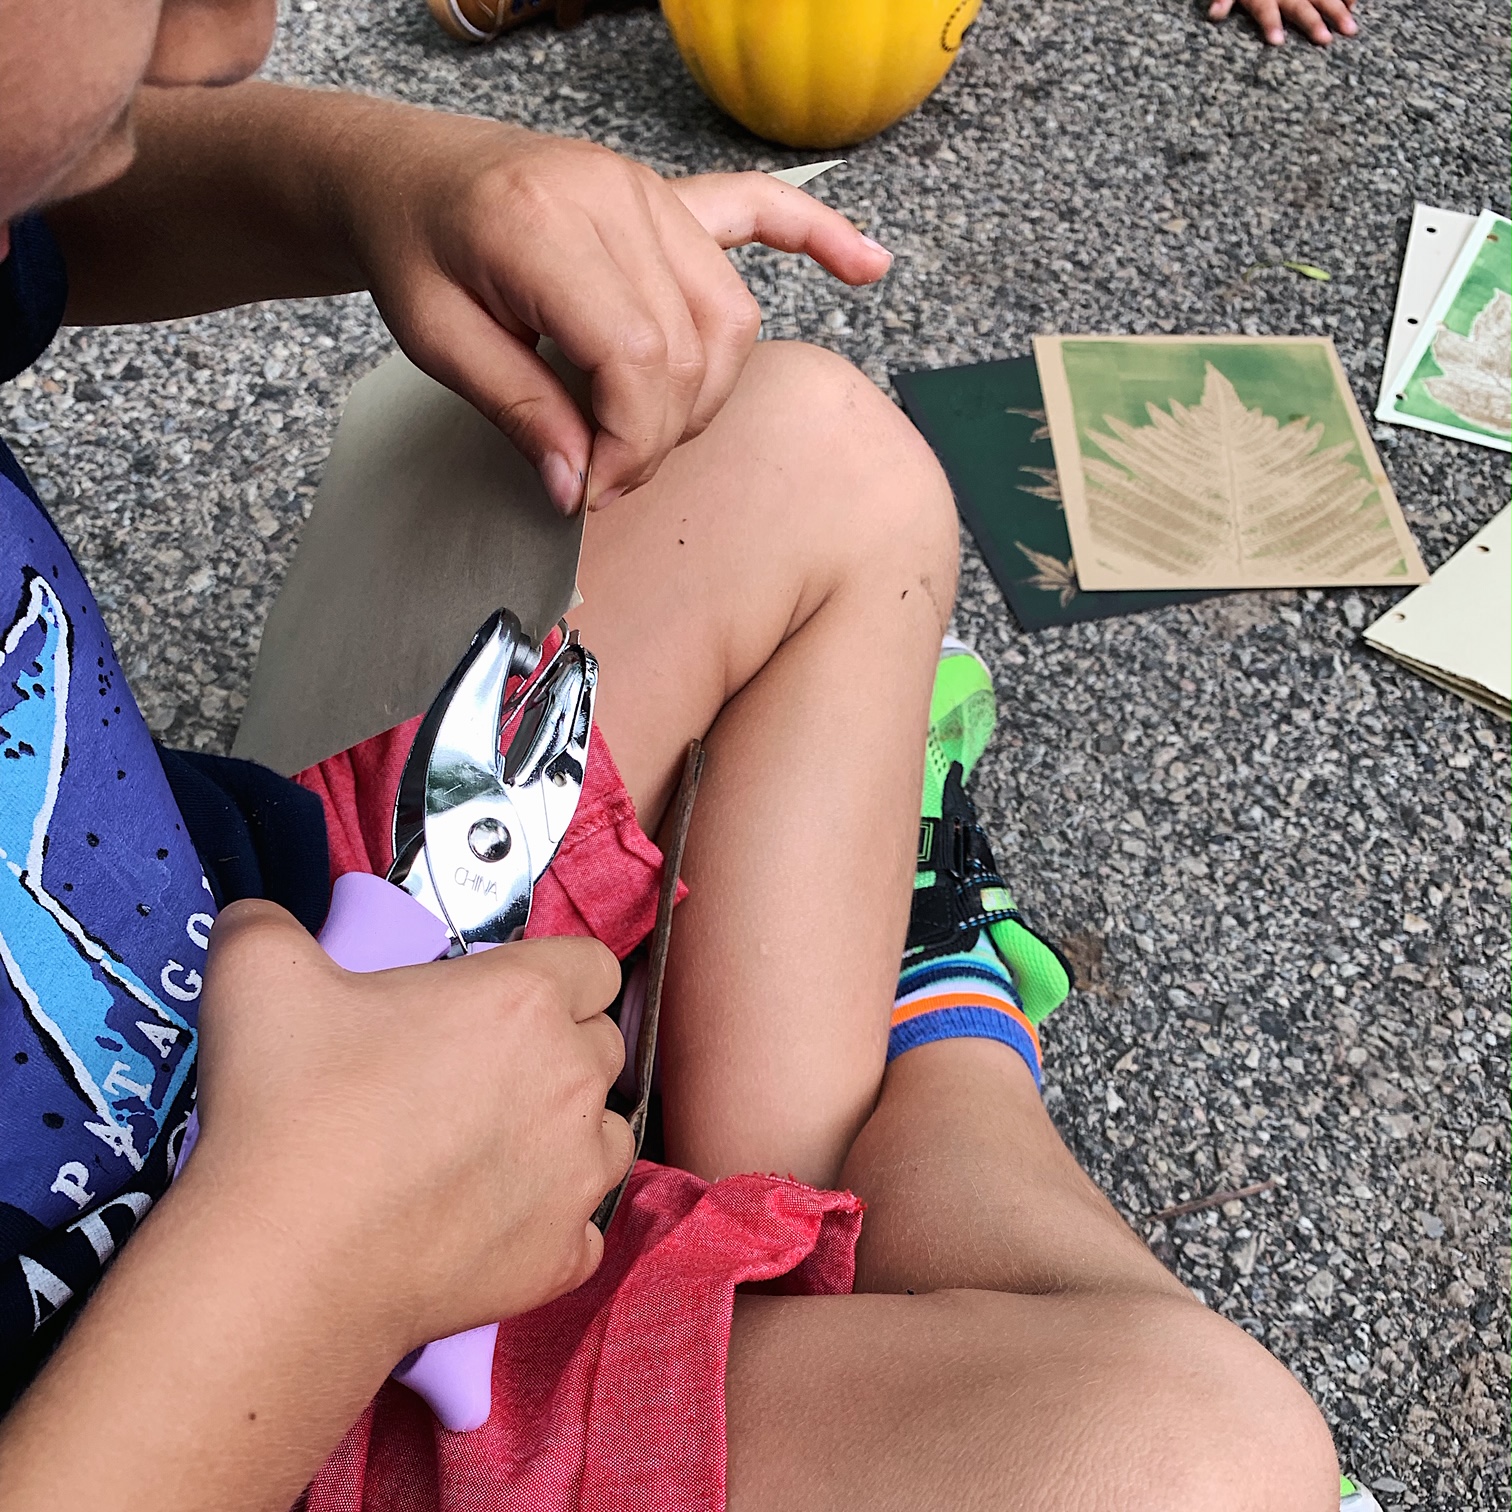
Get together your two outer cover pages (front and back) and inner paper pages, which should be cut down to roughly the same size. No worries if they’re a little uneven, as that’s part of the charm. To start, I lined up my two covers and one inside page to punch my preliminary “guide” holes. You need at least two, but more could be very decorative!
Just remember that the back cover will face downward (opposite to the front), so if the orientation matters be sure to turn it around when punching your holes.
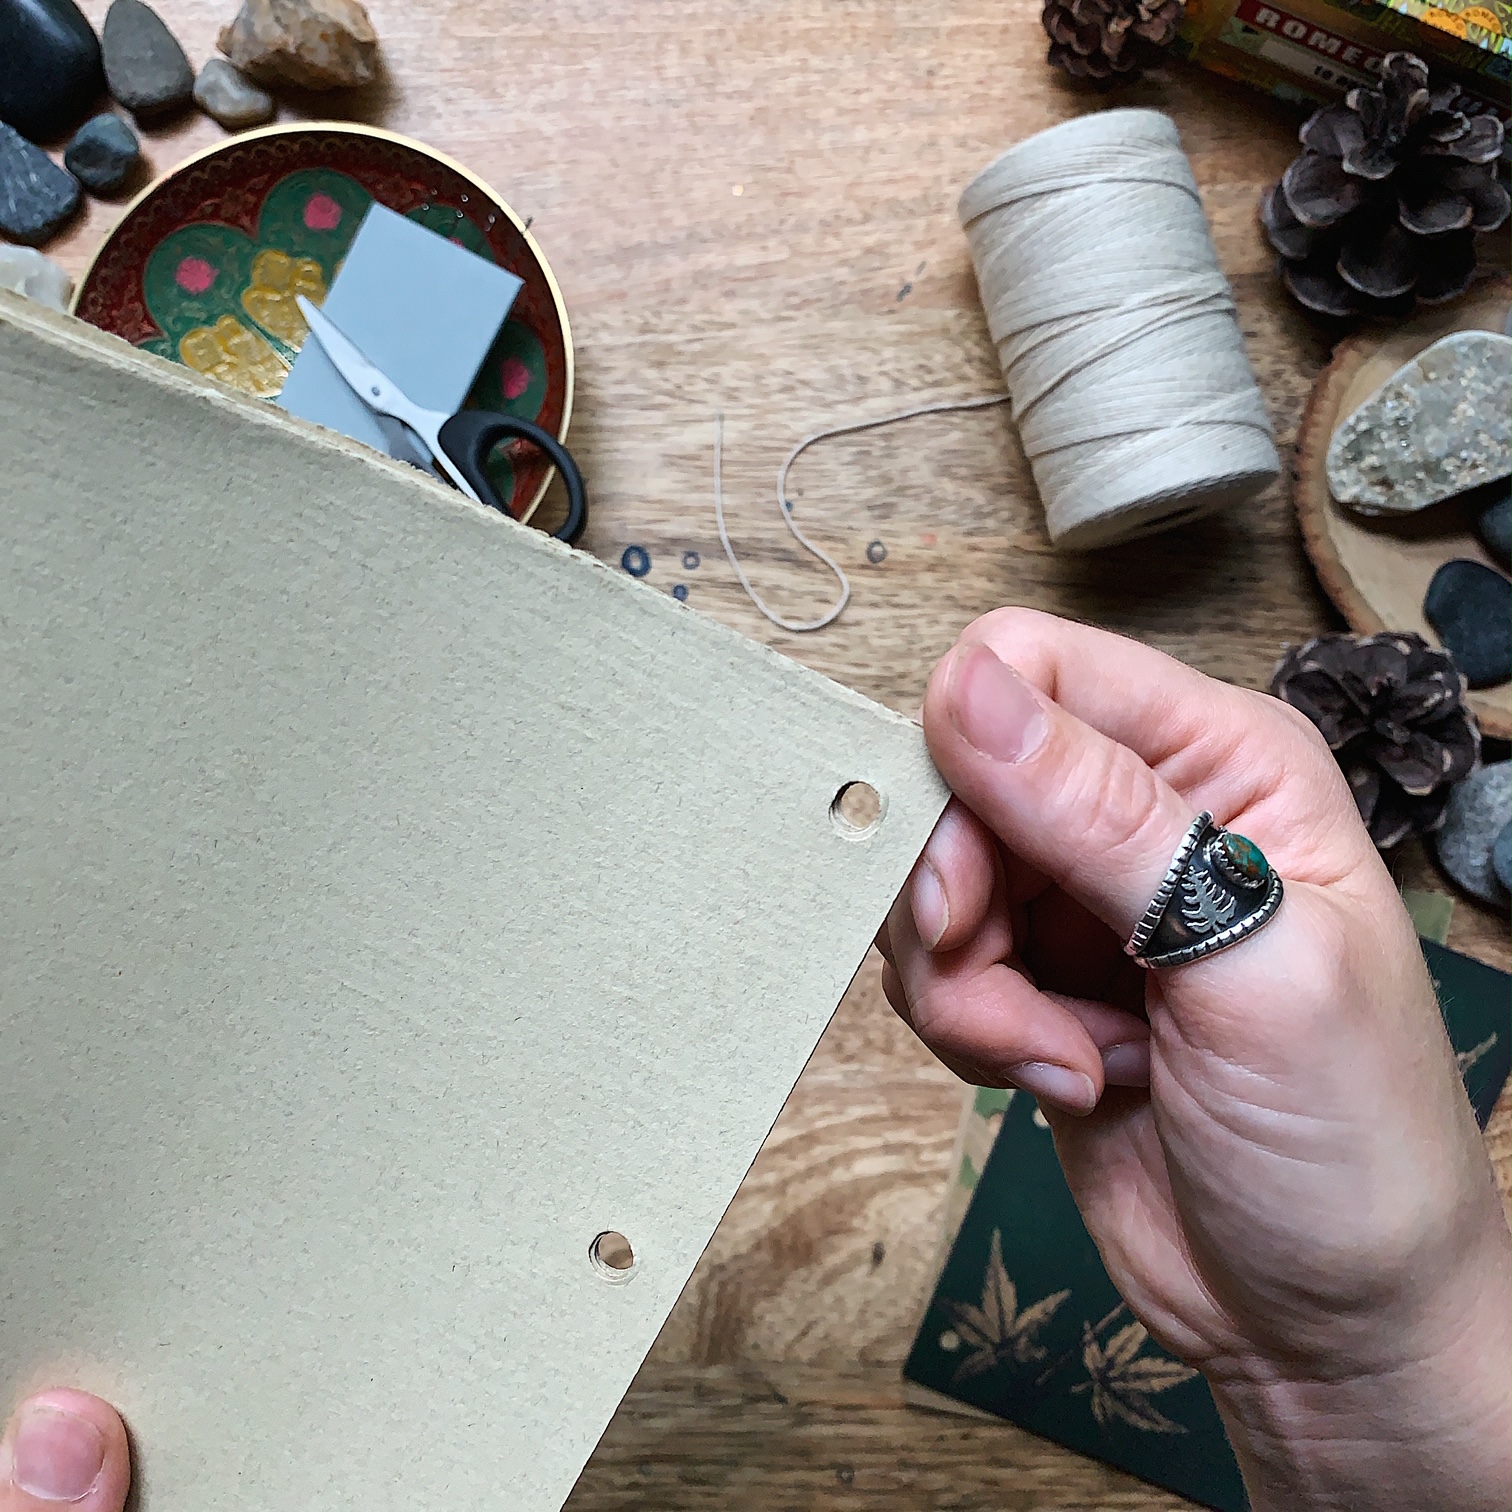
Use the first pages as guides to create holes in the rest of the inner pages. Again, no need to be absolutely precise, but you want to make sure the holes are far enough away from the edge that the pages won’t rip with use.
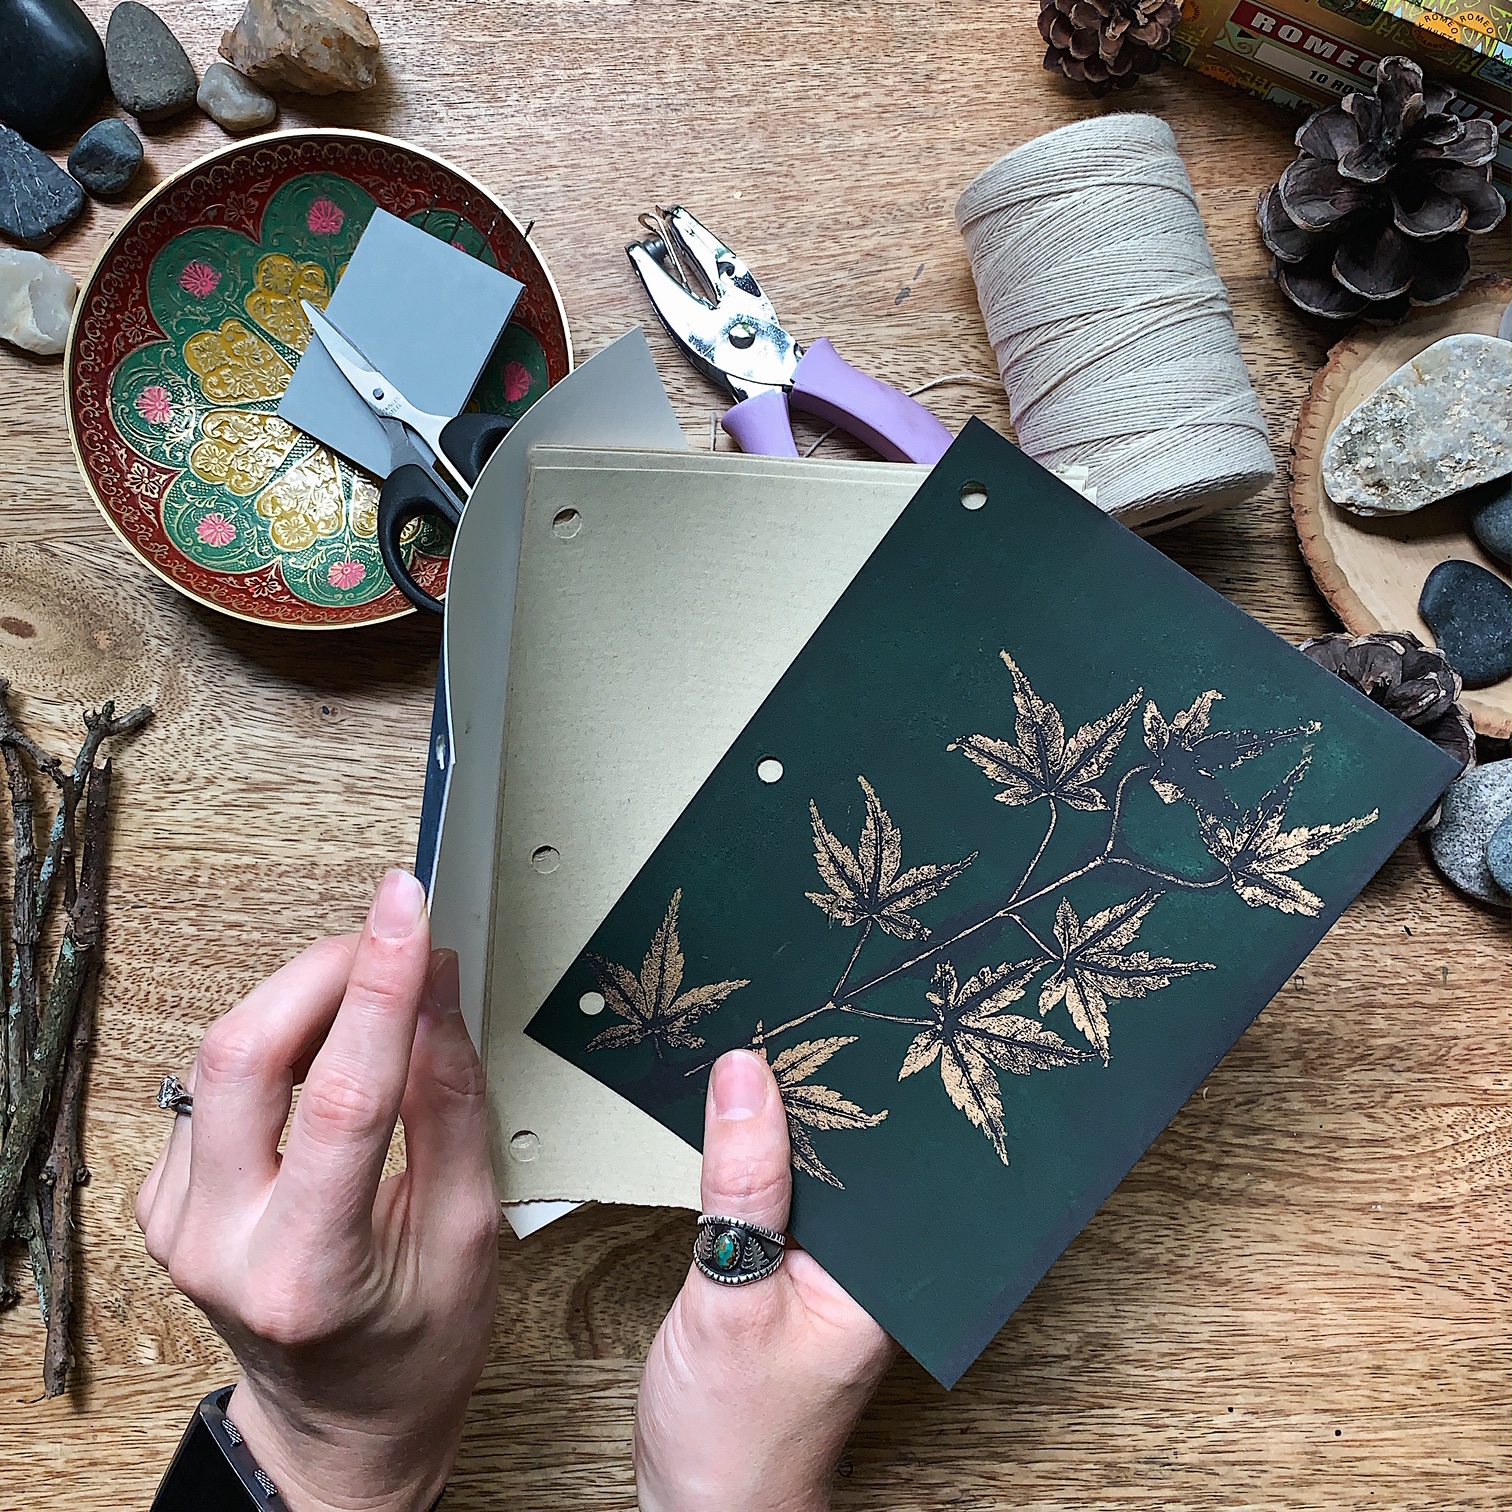
Next, place your pages in position, with an outer cover and back cover on either side of the inner pages.

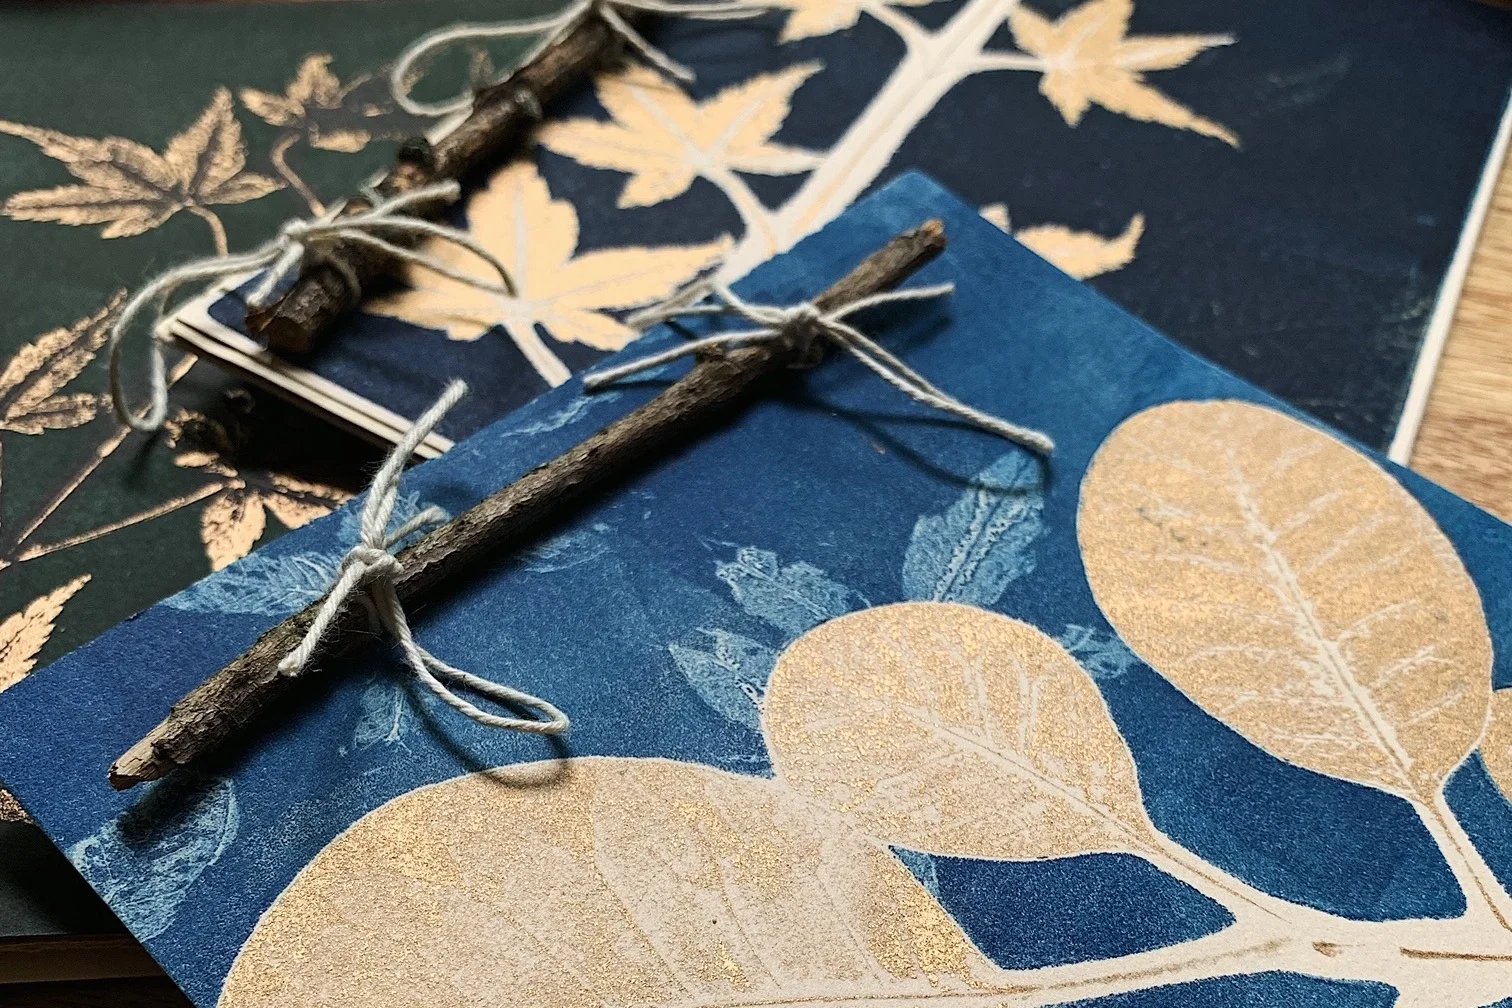
Select your sticks from your pile. Break them down to the right size, if necessary. They should be at least as long as the line of holes you made.
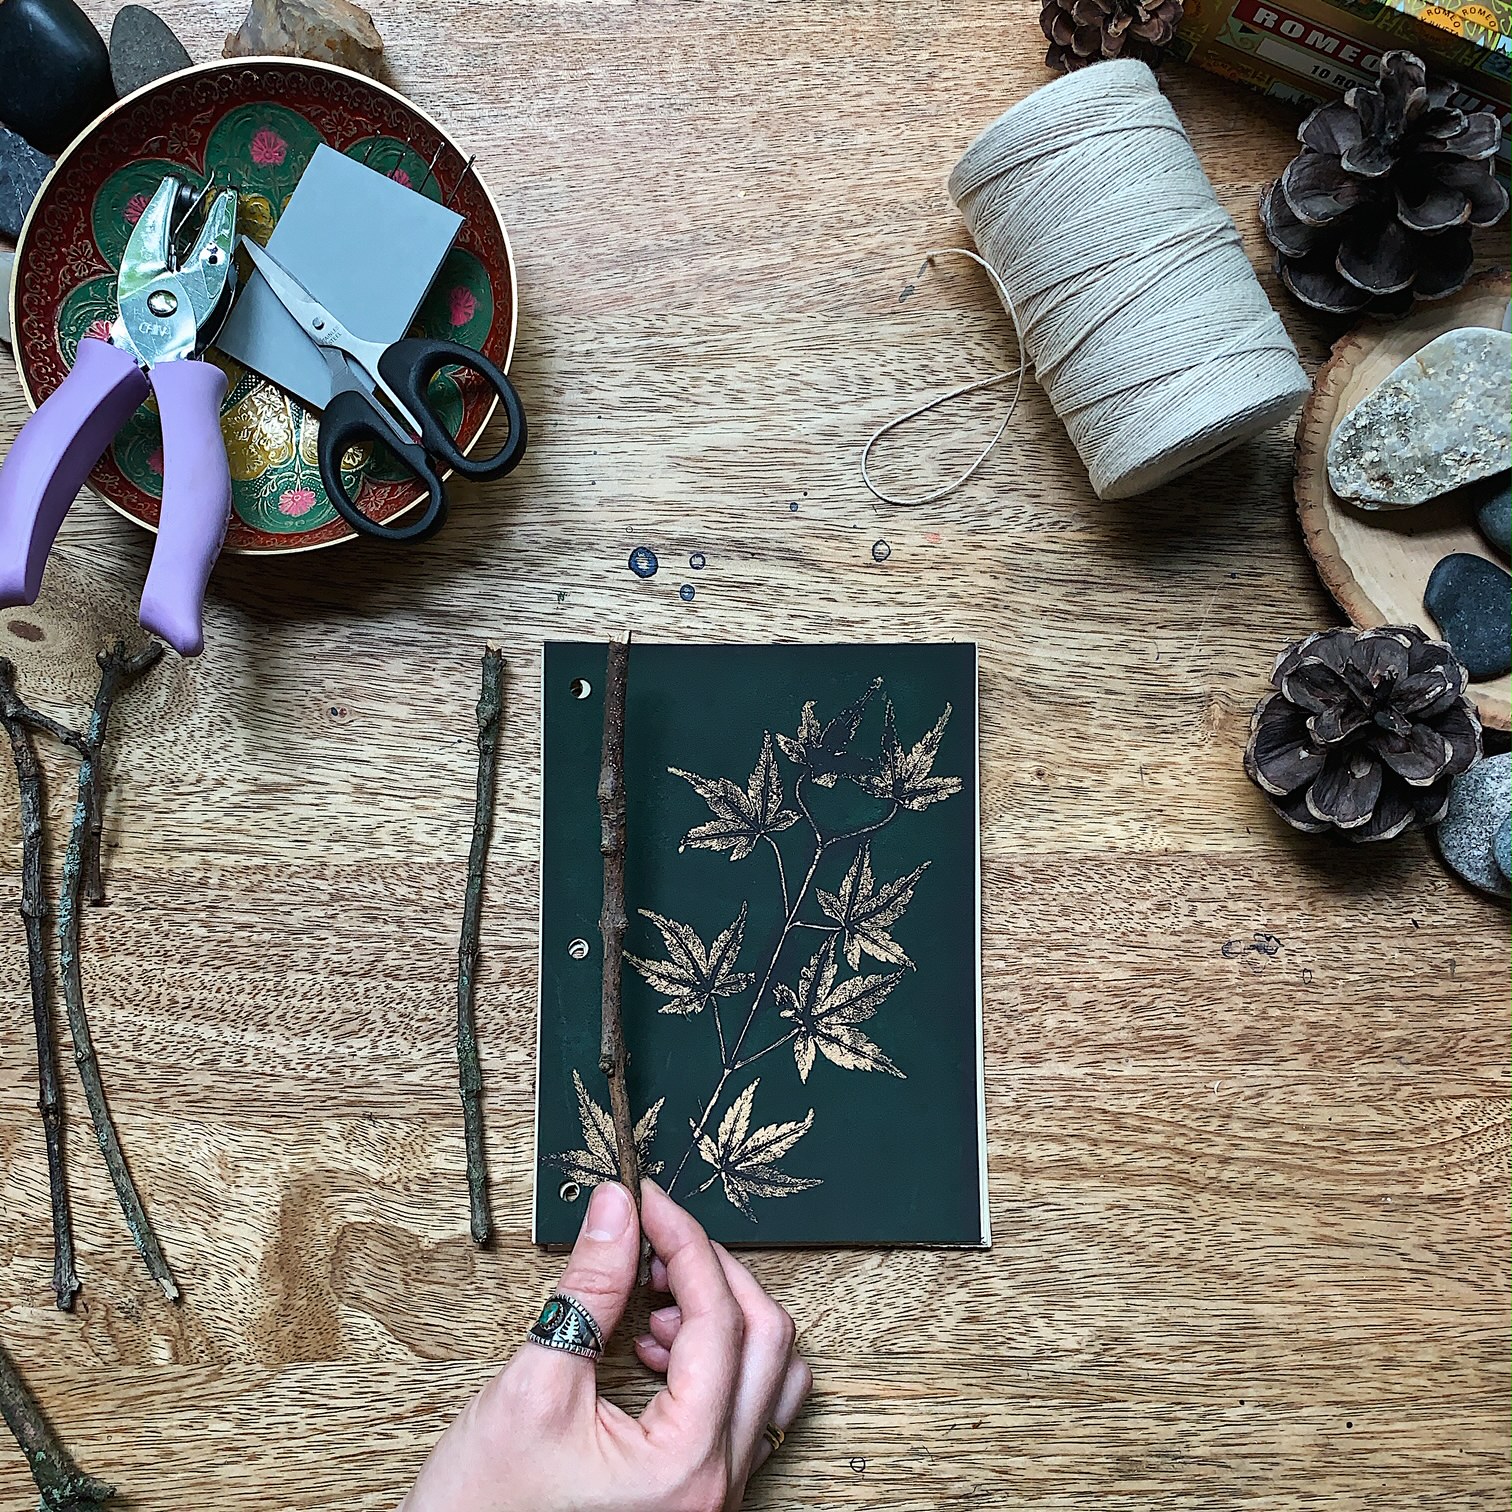
Next, you’ll cut pieces of string (you’ll need the same number as the holes you made, so in the case of these photos I cut three). The string pieces should be long enough that you can tie a nice bow after wrapping them around the sticks.
Place your stick next to the notebook, lining it up with the holes. You will tie each piece of string in a single knot around the stick next to the corresponding hole.
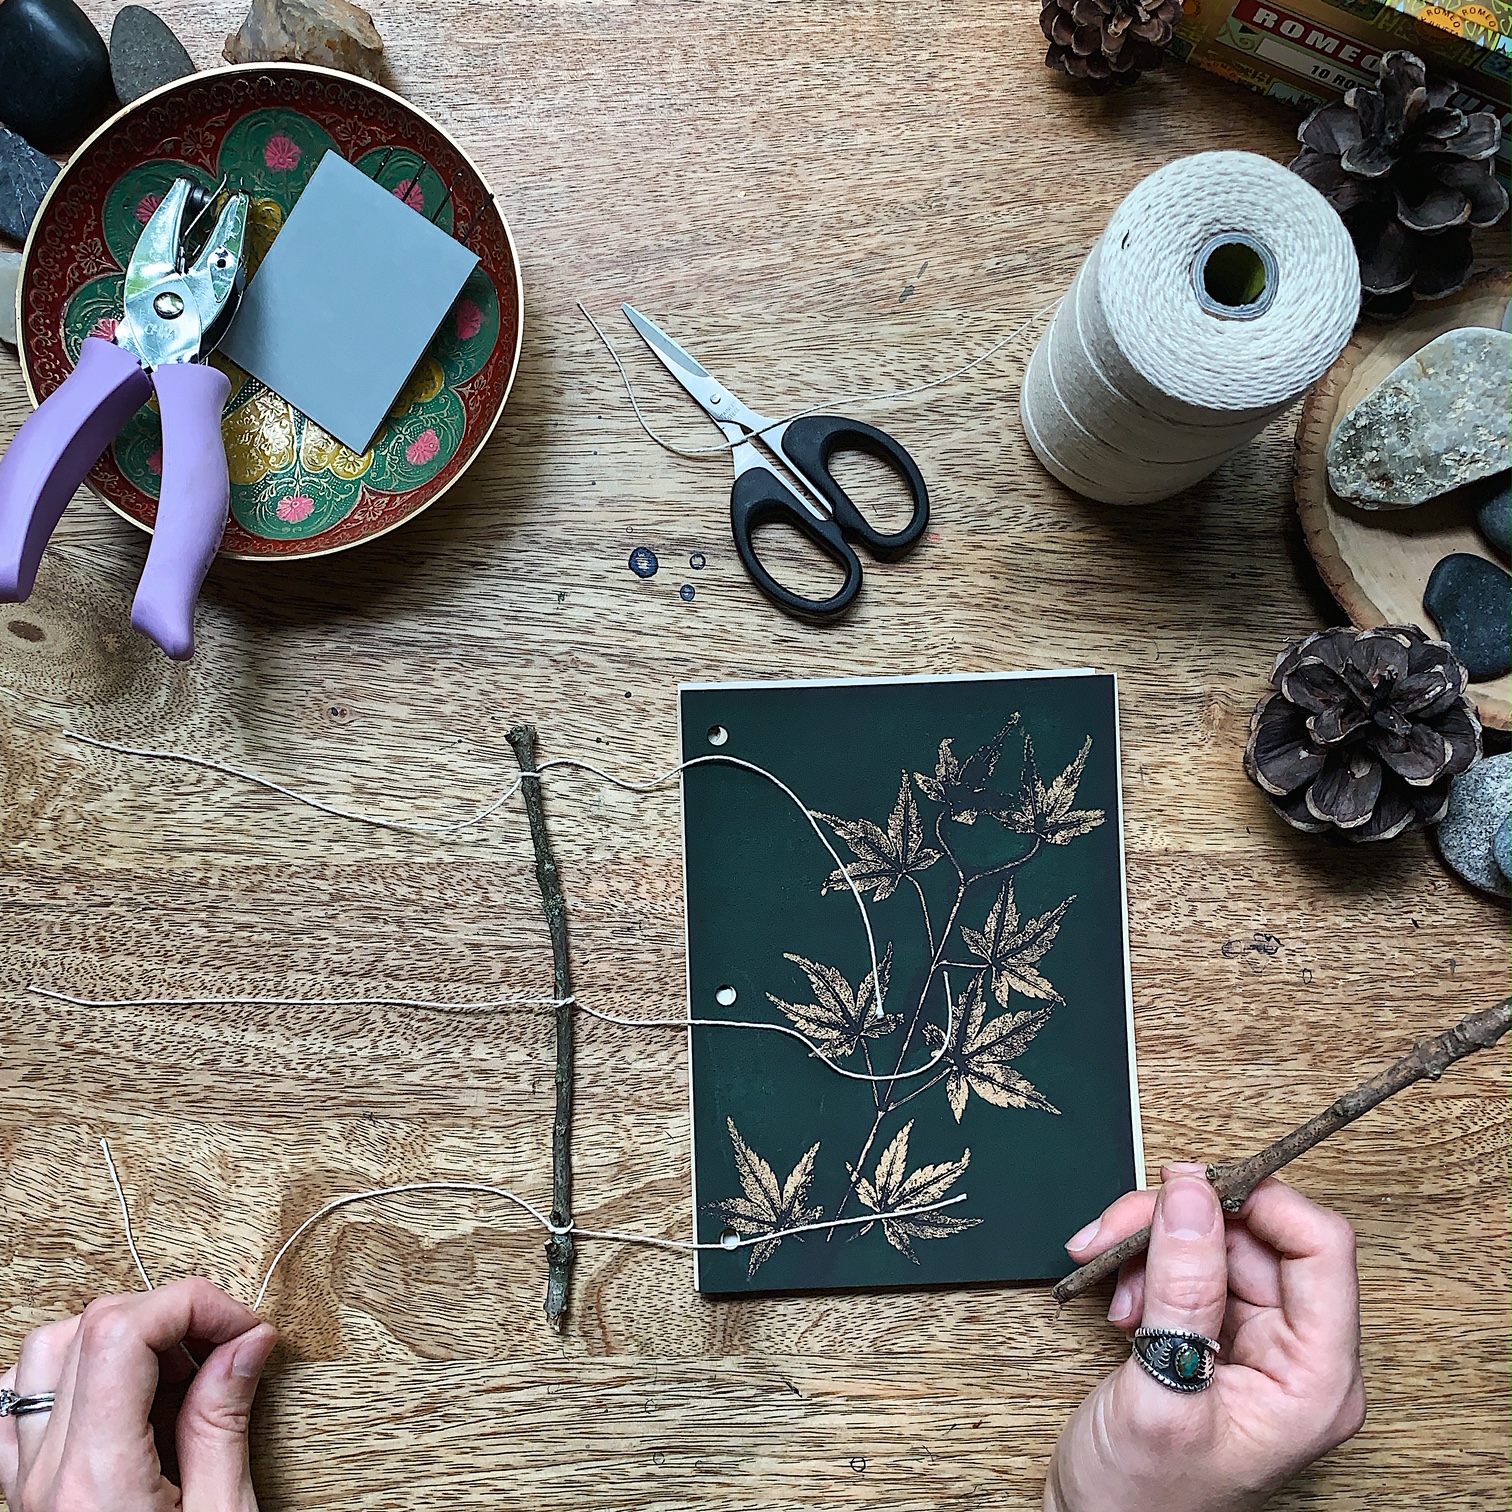
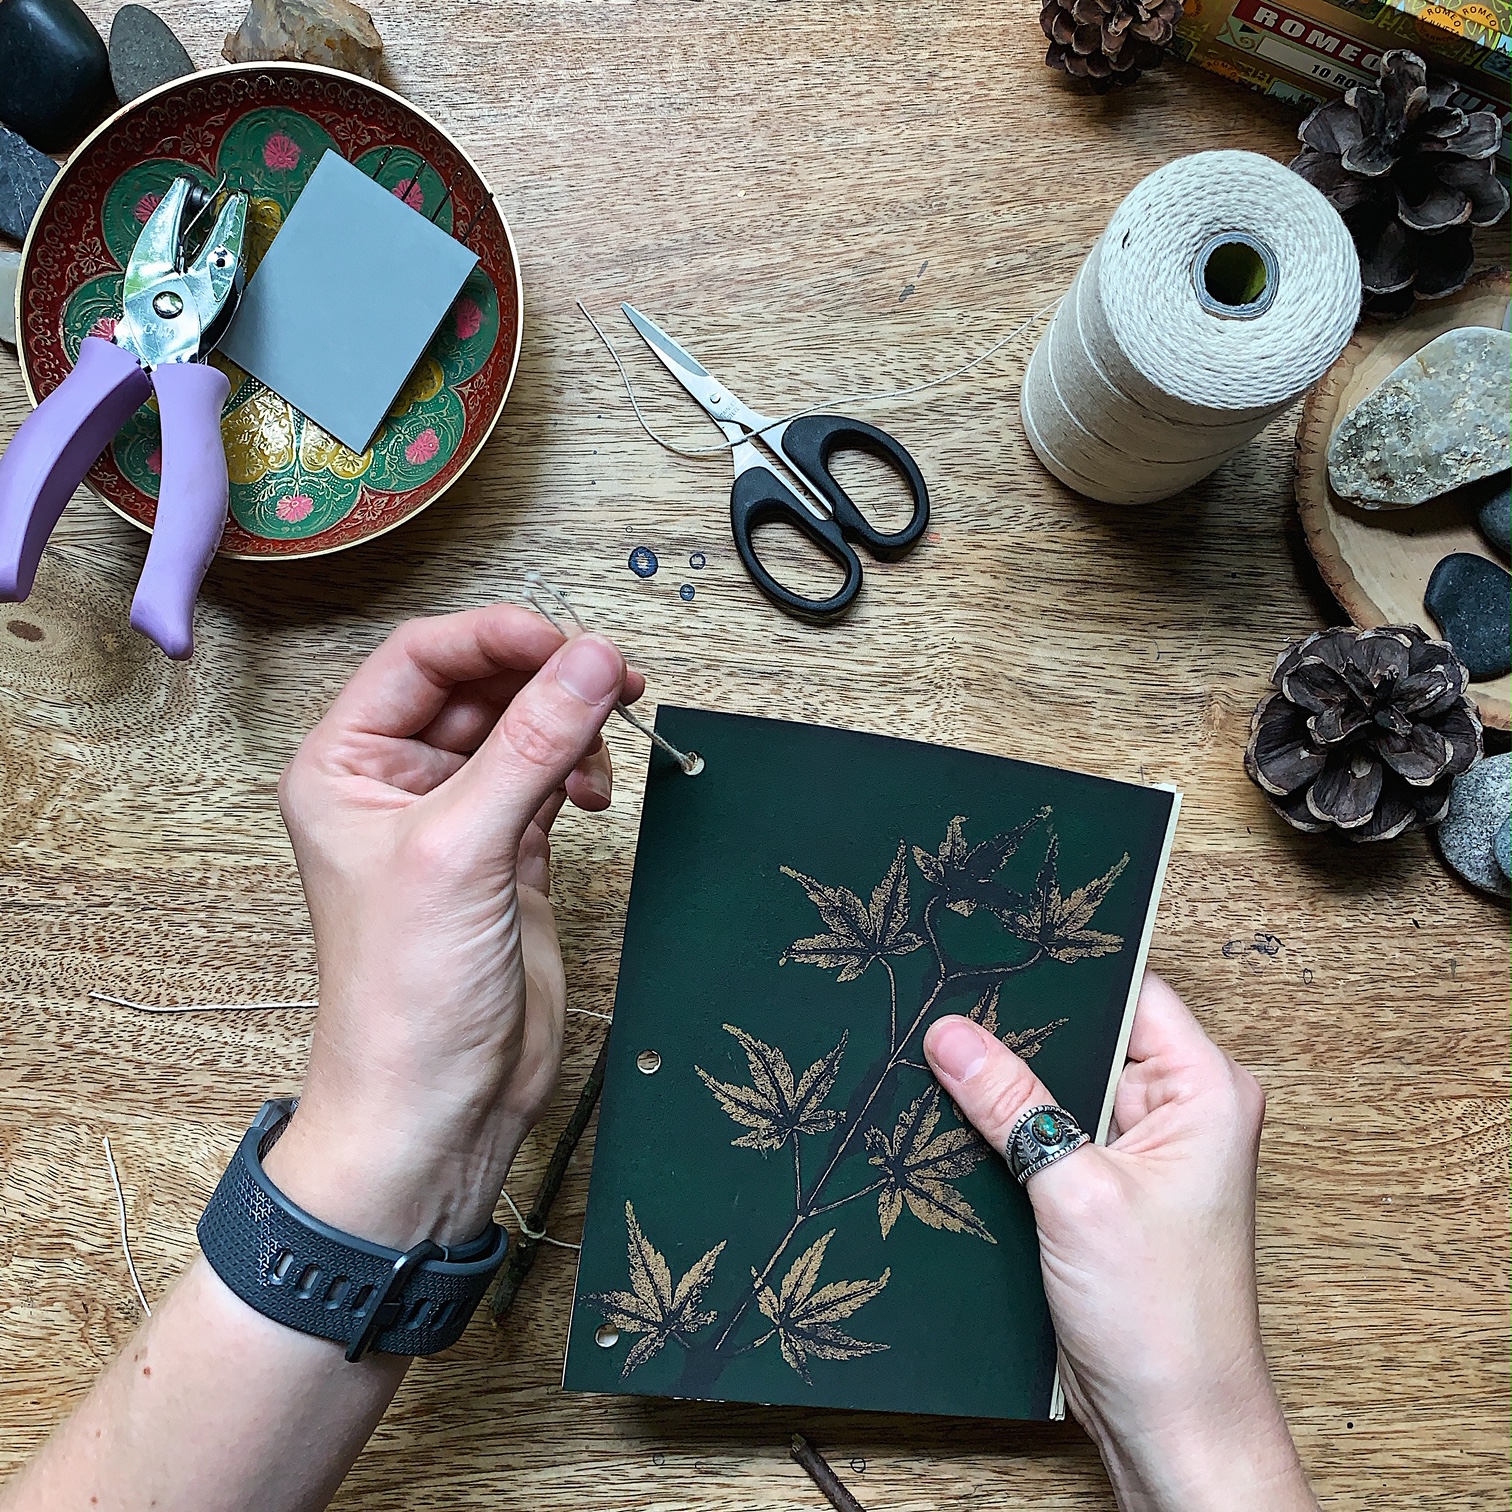
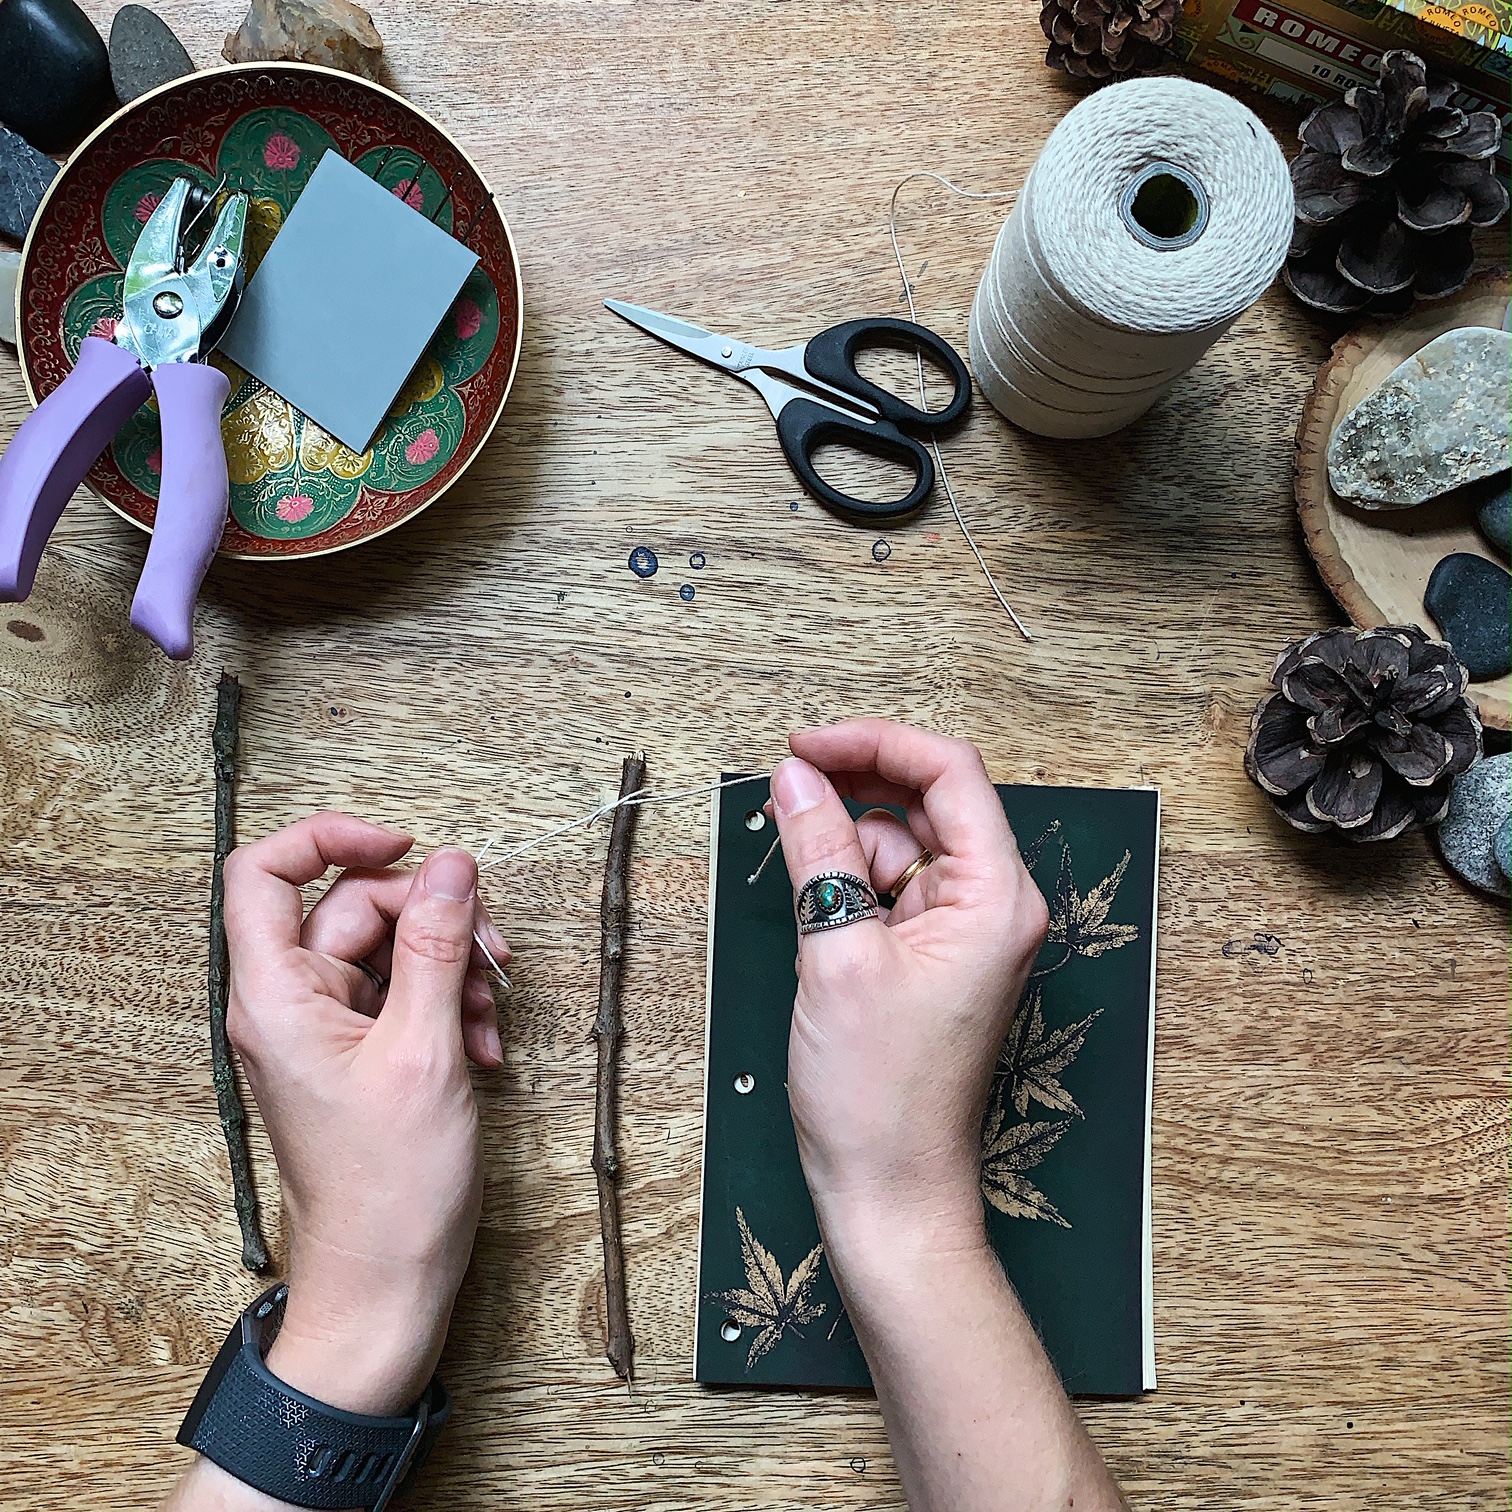
Once you’re finished tying the string to the stick, place the stick behind the notebook (against the back cover) and feed both pieces of each string through the notebook.
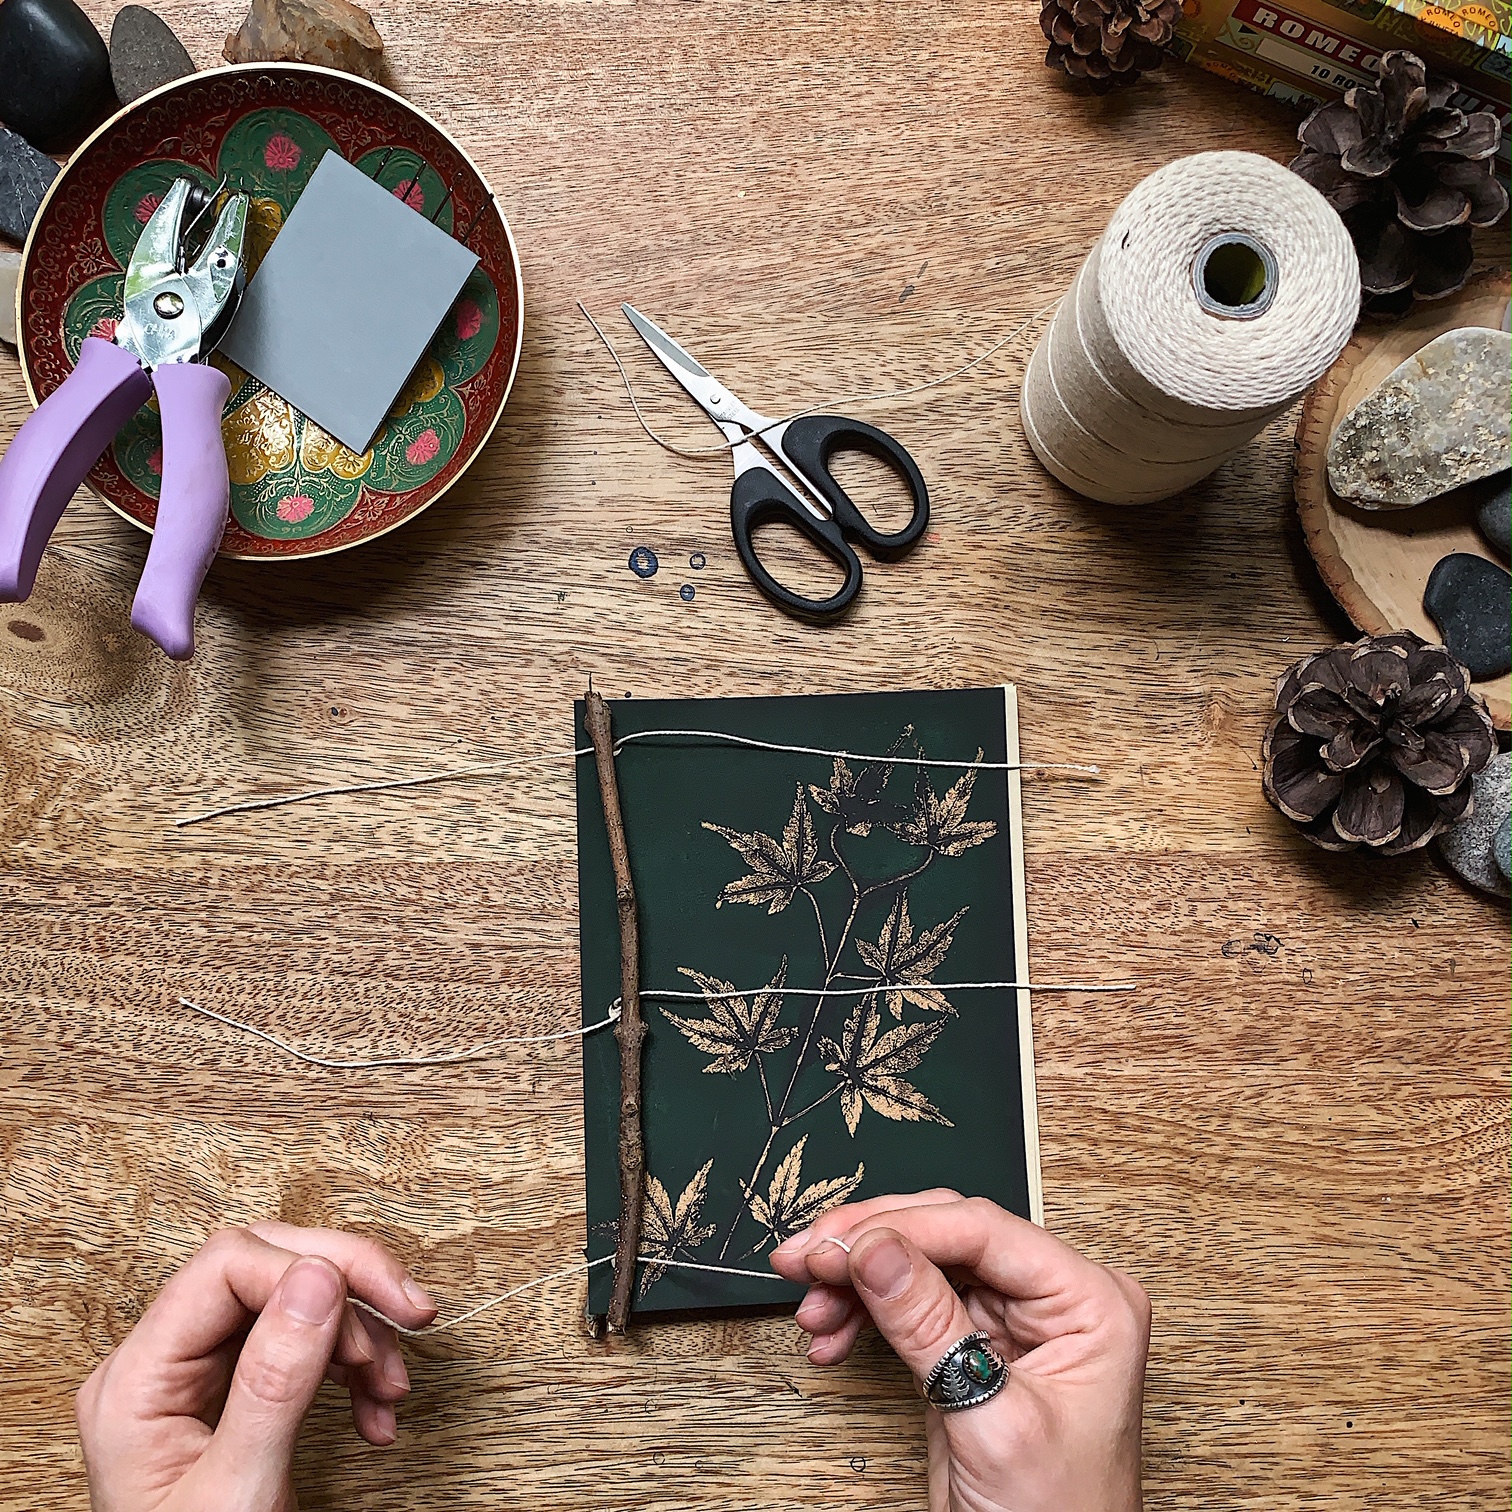
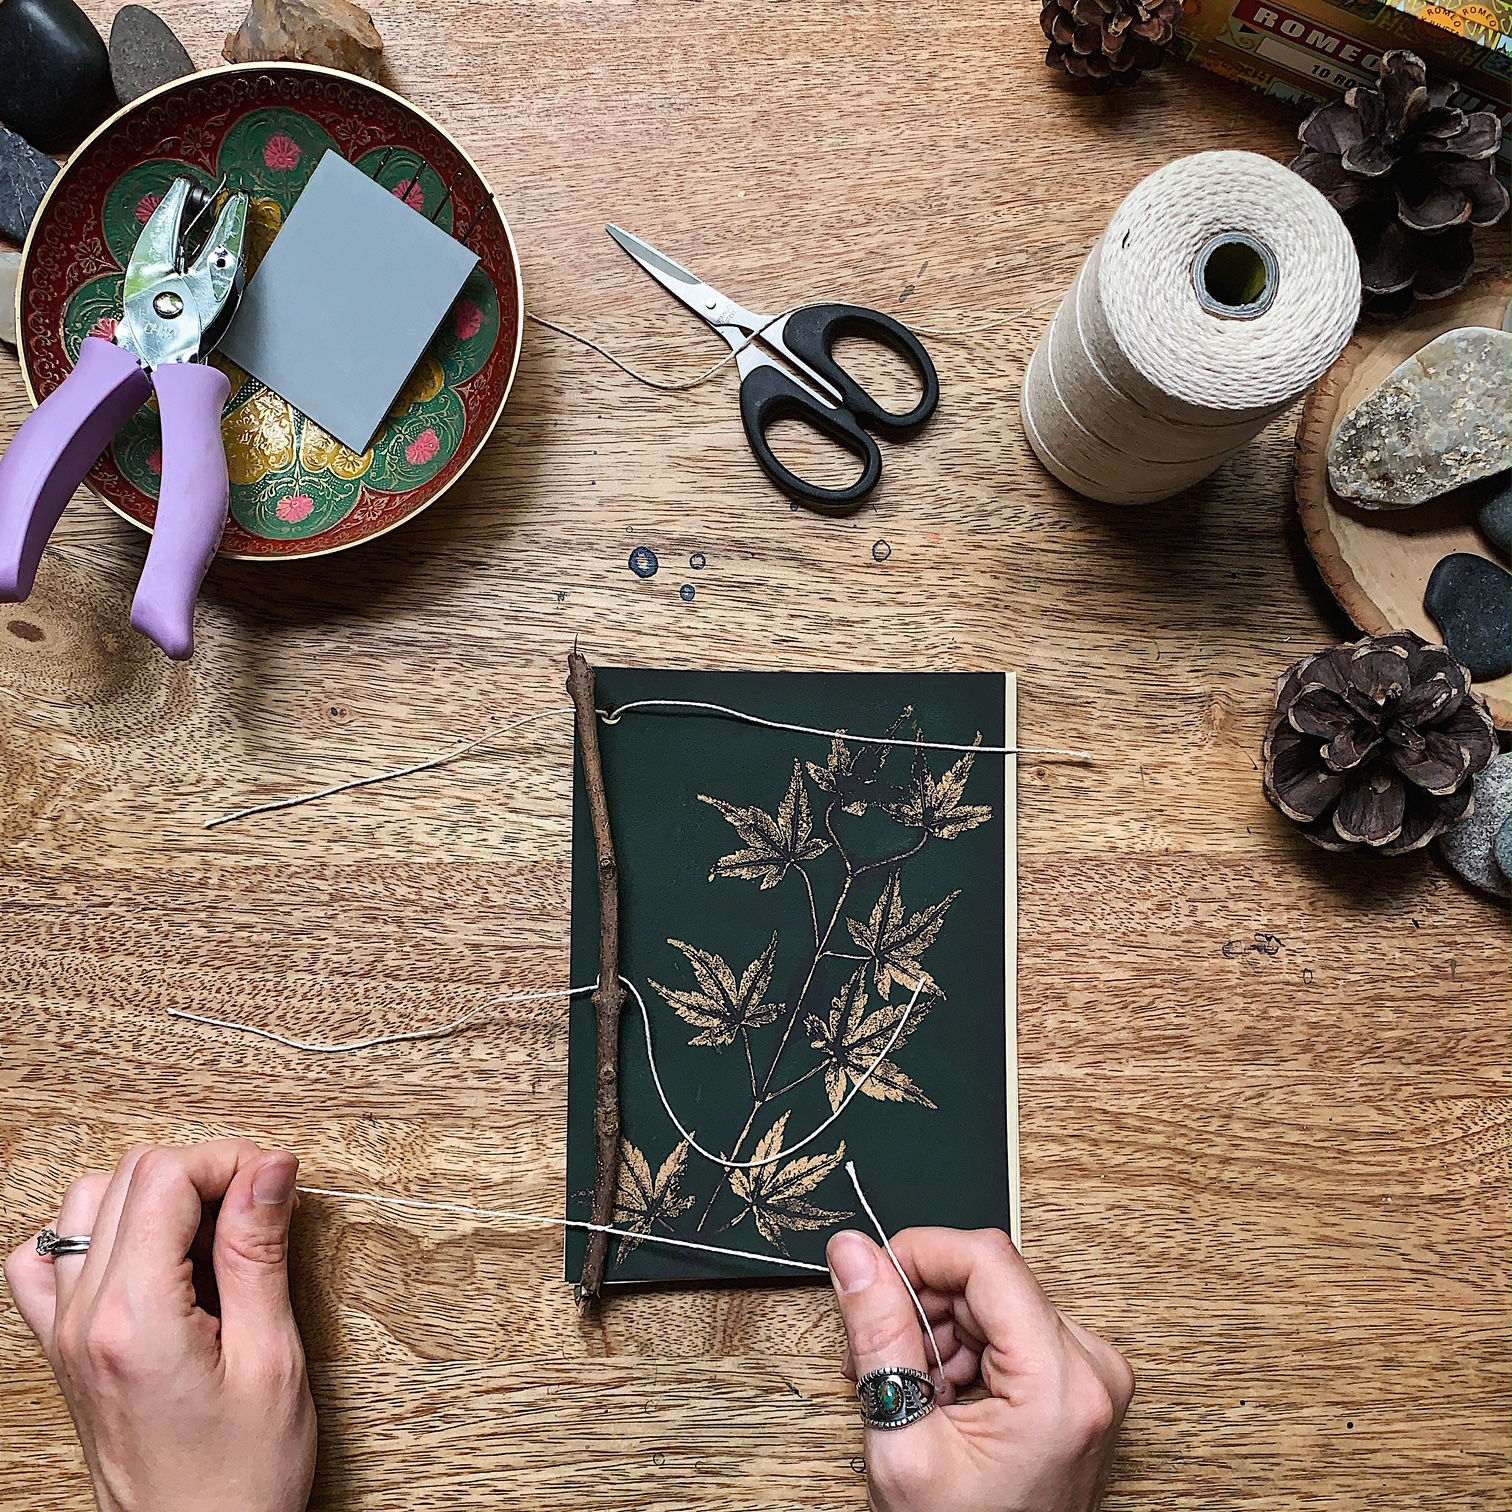
Once all the strings have been fed through, lay them out with one side from each pair extending in opposite directions. Place your second stick against the line of holes. Tie each strong around the second stick (tightly and double-knotting to ensure it’s secure).


Functional Artwork
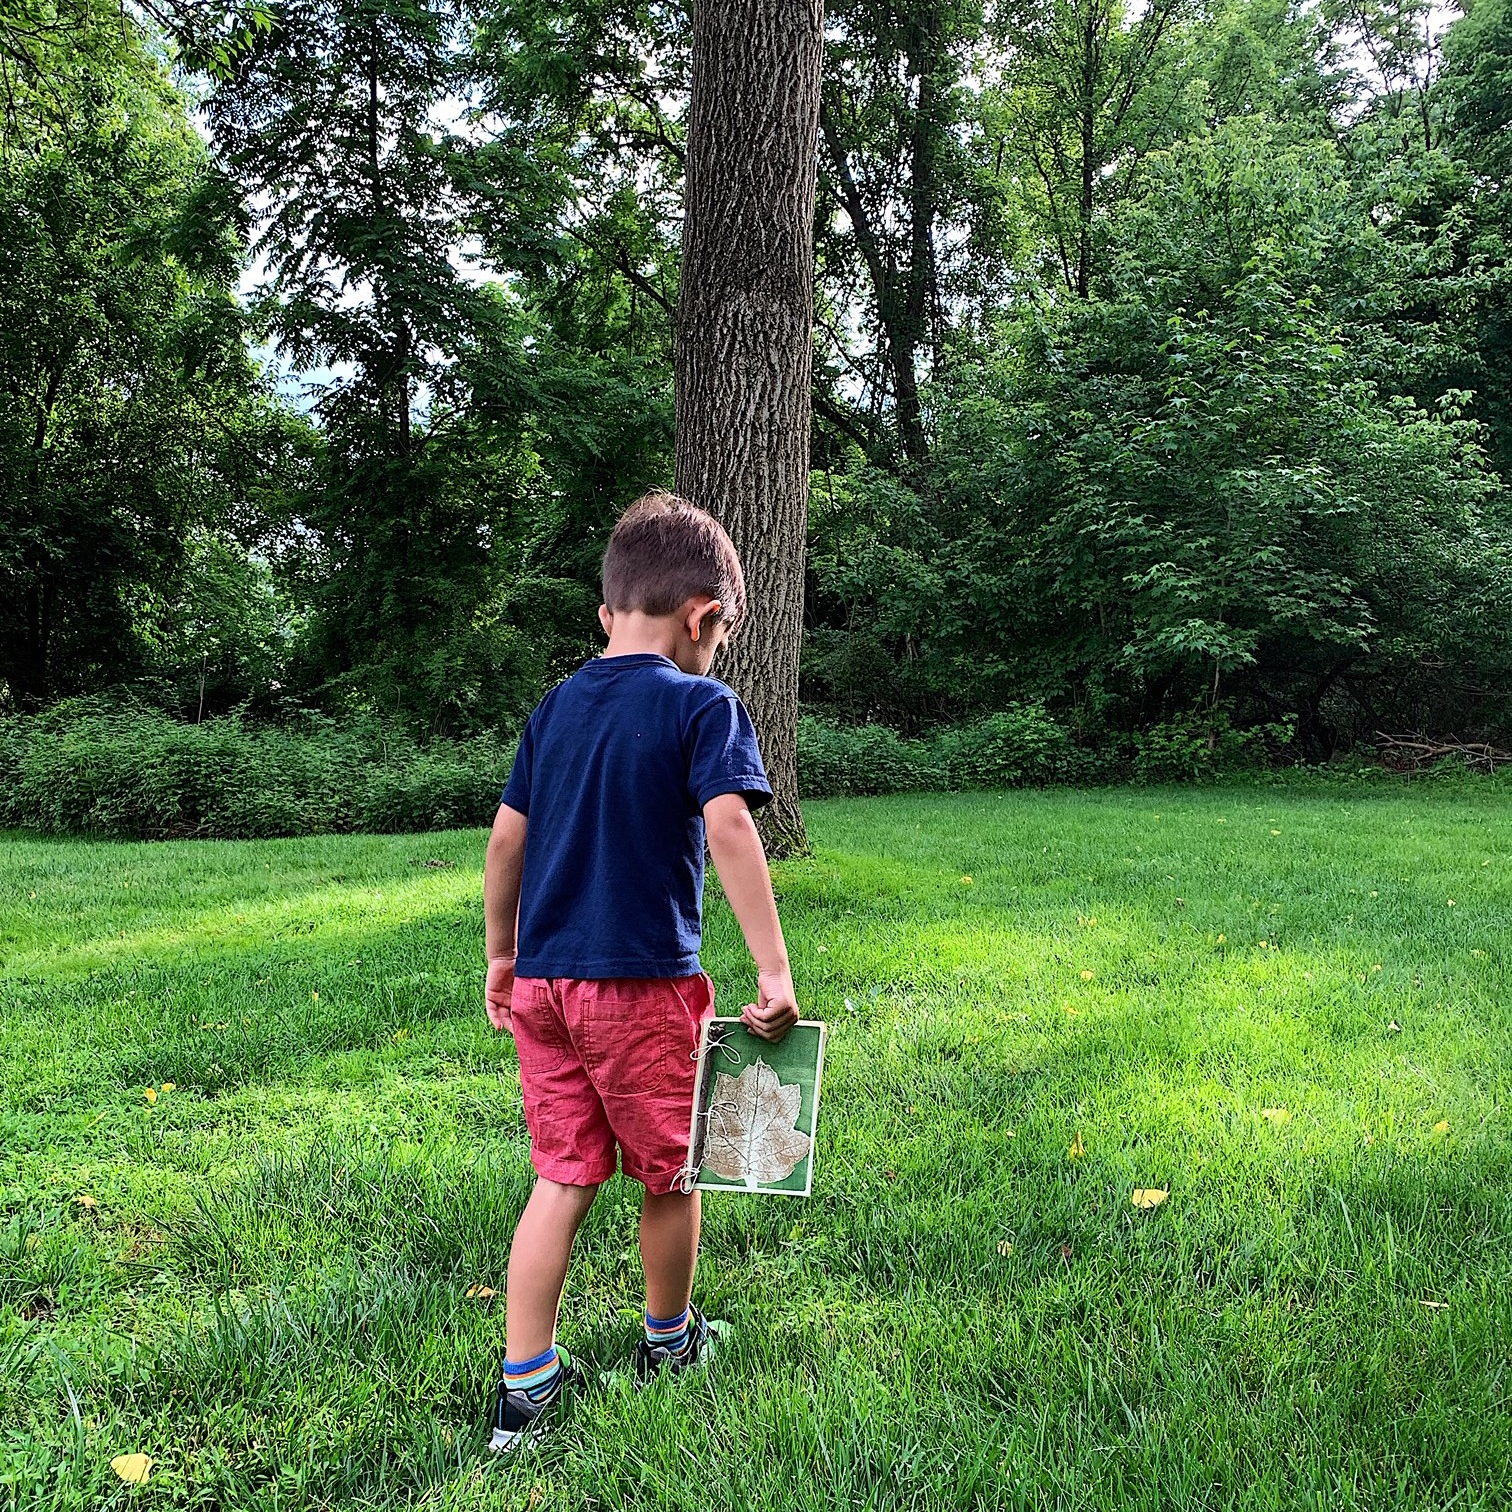
One of the wonderful parts of this project is that the results are gorgeous, but it’s not artwork that’s on a shelf or hanging on a wall. It’s something that can actually be used! Once we finished the one we made together, SJ darted back into the backyard and up into his fort. He immediately started drawing in it!
In addition to fun for kids, I think this could make a really beautiful keepsake book or gift for a loved one. Maybe you go on a really special hike with a friend or partner, and you create a book to jot down memories after or sketch out the landscape.
It’s definitely fun with kids, but I’m kind of in love with them myself. If you try it out, be sure to tag me on Instagram or use the hashtag #littlewildhands!
I want to be transparent and remind you that the links provided are to Amazon. I am a participant in the Amazon Services LLC Associates Program, an affiliate advertising program designed to provide a means for me to earn fees by linking to Amazon.com and affiliated sites. That said, any item I link to is something I’ve used and feel confident recommending.